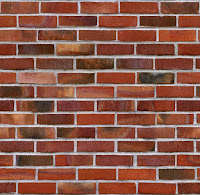
Textures
-POST 1- Title: parking lot
This exercise allows you to cut a shape from an image.
The shape will be the outline of your name. The image you get from the internet.
ITEM 1-a) Go get a new LARGE image of a 'Mall Parking Lot'. COPY and Paste it in PS.
FILE - PLACE the letters of your first name - organize them - resize them-highlight the letter layers -MERGE the layers of the letters( makes them into 1 image) -Rename this layer
CTRL - click the thumbnail- to highlight the edges of the letters.
Hide only the letter layer not the 'Mall Parking Lot'.
Now your name should be highlighted on top of the 'Mall Parking Lot'
With the 'Mall parking lot' highlighted ...
- If you press delete you would delete the letters from the image... but we want the letters!
- Press SHIFT-CTRL-I to highlight everything BUT the letters.
With the 'Mall Parking Lot' layer highlighted - Choose delete. Now you have your name with a mall parking lot back ground.
Crop appropriately - add your blog address -post
***
MAKE SURE to Add your blog address to this image before posting
***
Save as a PNG file. Title: mall parking lot
ITEM 1-b) Do your last name with a LARGE image of the whole Earth from space.
***
MAKE SURE to Add your blog address to this image before posting
***
Save as a PNG file. Title: earth from Space
ITEM 1-c) Using your first and last name from a) and b) above create a third image using 'upside down map'. IF you created a third name from the first assignment- then use those letters -instead.
***
MAKE SURE to Add your blog address to this image before posting
***
Save as a PNG file. Title: Upside down map
Title: Overlays
Overlay blending allows you to map a texture over your image like in ITEM 1 but without replacing the original image. You see both!
Open your name then PLACE the texture on a new layer above your name. Size the texture to fit the size of your name. CTRL-CLICK the thumbnail on your name layer. Shift-Ctrl-I to reverse the highlight. Delete from texture layer.
If an error occurs you may need to RASTERIZE the texture layer.
Try Blending Options such as: Normal, multiply, lighten and overlay. Play with opacity on the name layer to find the best look.
Post your texture along side your name
1. First name - materials -Tilte: overlay material
post material skin along with your own
2. Last name - animals -title overlay animal
post animal skin along with your own
3. First and Last - Nature - title: Overlay nature
post nature skin along with your own
-ITEM 3-
Advanced: Get your own pictures- get your own texture!
Post both along side the finished product.
Photoshop Tutorial - skinning/texturing
http://www.foundmyself.com/forum/viewtopic.php?t=41The clone stamp does work - however, you may continue to work in the method learned
1. car -Title overlay car - background is a planet scape
2. an animal -Title overlay animal - background is the sky and clouds
3. tree - -Title overlay tree - background is the ocean
the background
<div style="background: url(http://tinyurl.com/hy873po); background-size: cover;">
Your text goes here...
</div>
http://members.optusnet.com.au/mr.goodpart/balls/balls.htm


No comments:
Post a Comment